After playing with my digital camera a lot I have found that I still need to use photoshop to retouch the photos, mostly to fix colours in photos taken inside. I have become resonably skilled at touching-up photos and thought I would share the little I have learned with anyone who is interested.
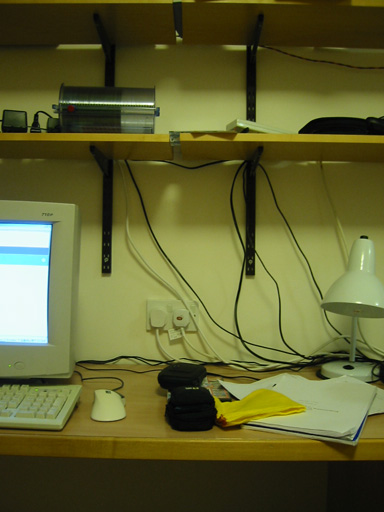
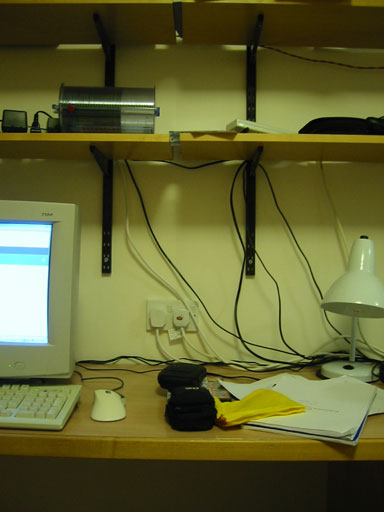
My sample photo is below, taken a few minutes ago here in my room at Warwick Uni.
I expect you've noticed how this photo really does not look very nice! Now it is hard to see what is wrong with it on this website, but to me sitting in my room I can see quite clearly that it looks green/yellow. Also it looks quite dark. I am going to try and fix this in Photoshop (I use version 7.0, but I expect that this will work on almost all versions!).
Firstly load up photoshop, and open your photo ( you can download the one above and use that if you like: 01 Original).

Notice that I have placed the photo at the top left of my workspace, this is so that when dialogs and so on popup I will be able to see the effect of the sliders more clearly. (The dialogs would obscure my view if the photo was in the centre of the workspace).
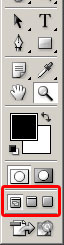
Left is a screen shot of the tools panel in photoshop 7, the controls I am insterested in for now are the ones within the red box. Most people I know have not ever fiddled with these.
From left to right the button marked are:
Standard Screen Mode
Full Screen Mode with Menu Bars
Full Screen Mode
Standard Screen Mode is just as shown in the picture above, Full Screen Mode with Menu Bars is just that, the title bar and the windows taskbar dissappear and the space is used for displaying photos. Full Screen mode is one step further where the whole screen is black, with your photo in the centre, and just the floating panel ( such as tools, and layers ).
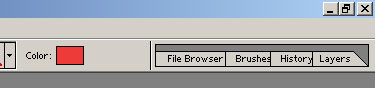
Above are two screen shots of the panel tabs. I find that the floating Layers panels and so are usually in the way, so I have dragged the ones I use the mose ( History and Layers ) the this part of the workspace, where they have docked. Then I closed all the floating panels (except tools).
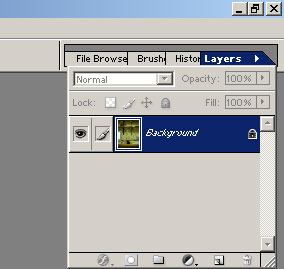
When I want to change someting on a layer, I click "Layers" and the screenshot of the left happens. I find this very handy, especially in Full Screen Mode.
The first thing to do to this photo is Auto Contrast, and then possibly Auto Levels. This will set the contrast to a maximum, without losing any detail. (Imagine you had a grey colour filter infront of the camera when you took a photo, then the result would be quite bland, Auto Contrast would fix this).
The functions used below are all found under IMAGE > ADJUSTMENTS.
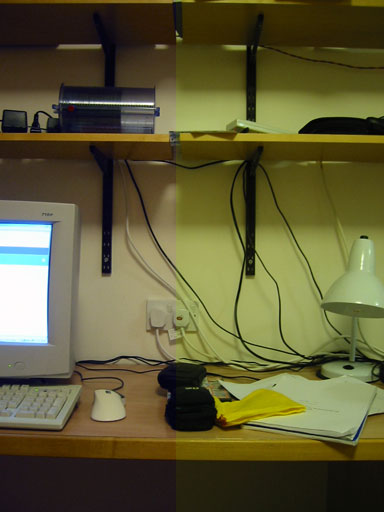
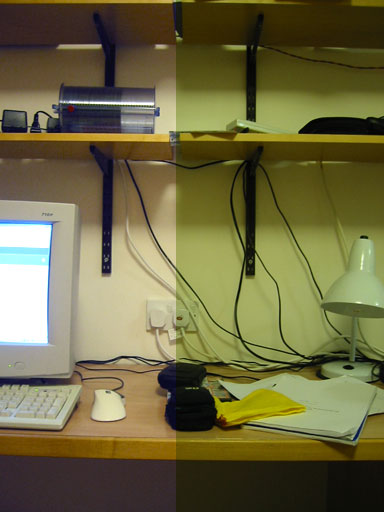
In this particular case there does not appear to be much difference. Above is a splt image ( down the centre ) left is the Auto Contrast version, and right is the original.
Here the difference is much more noticable! On the left is the Auto Contrasted, Auto Leveled version, right is the original. Levels are kind of like mini-contrasts between any two adjacent colour in a colour table. By altering the levels you can bring out the shadows ( ie make things in the shadows clearer by increasing the contrast for all dark regions ) and other similar things.
Now I have applied Auto Color, and the difference is very noticable. I only just discovered this item in the menu, and have actually been doing the equivalent manually for ages!.
Now for some manual tweaking ( here is the interesting bit ).
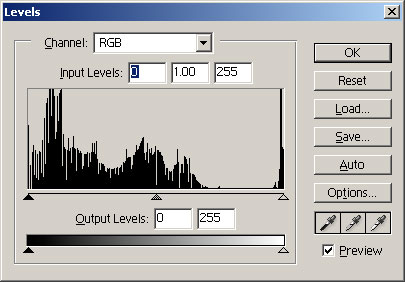
Open the level dialog ( Ctrl + L ) and play with the little triangles at the bottom of the graph area, I find that sliging the grey one to the left a little brings out the shadows, which generally helps make things clearer, also I slide the white one to the left a little which will remove some of the 'glare' as so:
Now this may be a little too far, as the shadow under the desk looks too bright. I suggest you fiddle with the settings until you find something you are happy with!
The other thing I suggest you play with is the Colour Balance ( Ctrl + B ) and the Hue/Saturation ( Ctrl + U ).
Hope this was helpful to you!