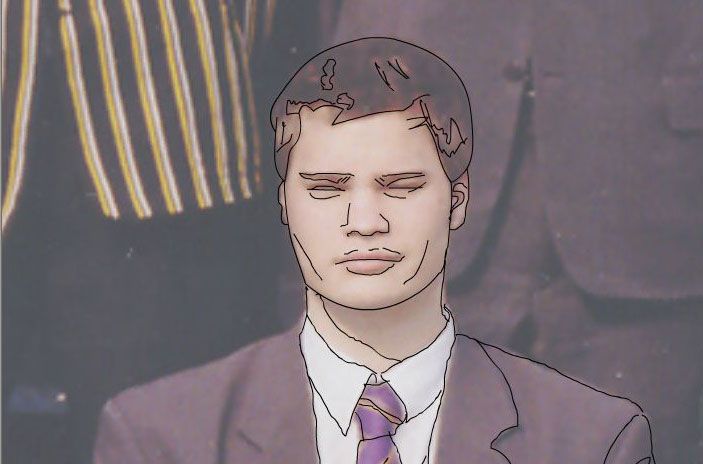
Below is the process of turning a photo of me, into a cartoon character.
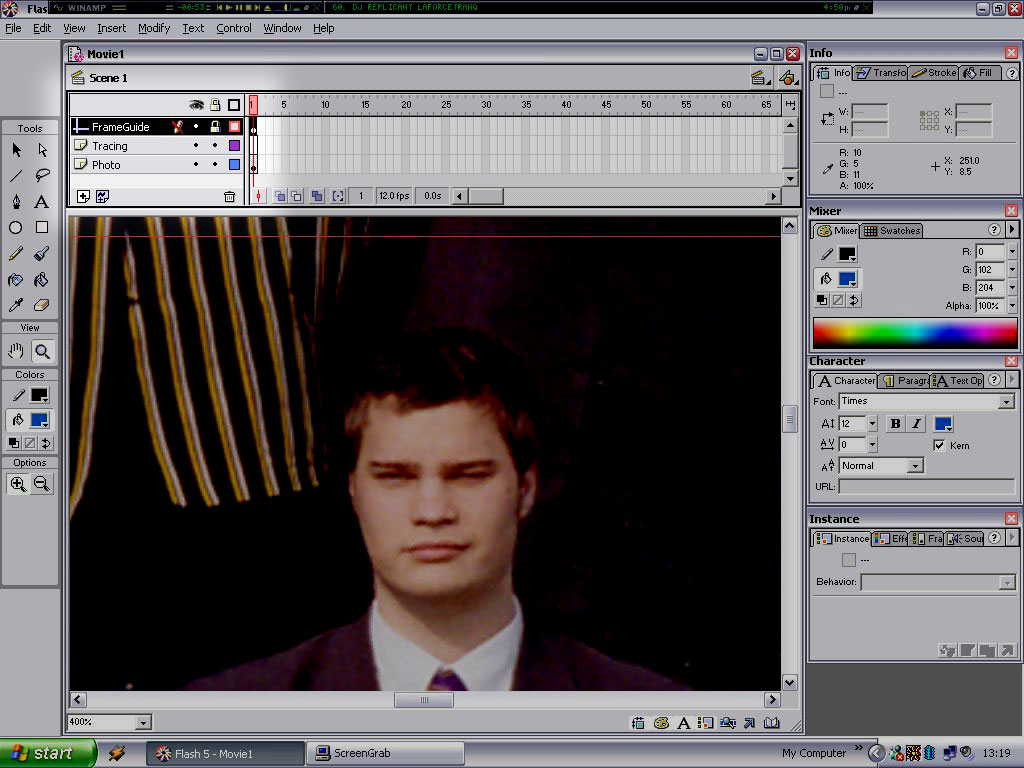
Setting up my work environment: First I set up three layers, the topmost is the Red line on a guidelayer called "FrameGuide" this is a locked layer which contains the outline of the scene, which is simply to let me know as I work if and when I start drawin things that will not be visible when exported. Effectivly the inside of the red box is the "viewable area".
The middle layer is an empty layer, and is the only layer which is not locked - this is becuase it is the only layer I intend to draw on, hence I have called it "Tracing".
The layer below that is the "Photo" layer, is locked becuase I do not wish to change or move the photo; this is one of the wonderful things about doing this digitally, the photo and 'tracing paper' will always be exactly on top of each other!

The next thing to be done is to convert the photo to a symbol, so that is can be manipulated using Flash's powerful effects. As you can see I have selected the entire photo layer (which is why the word "Photo" is on a black background) and have pressed the "Convert to Symbol" button. I have chosen the type Graphic becuase this is the simplist of all symbols. Movie Clips have independant timeline, and play like a TV on loop in the background. Buttons are interactive, and Graphics depend on the timeline and are not interactive.
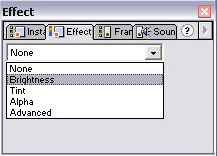
Next I apply an effect to the new symbol: Photo. By adjusting the brightness to make the photo more washed out the colour 'edges' are easier for me to see, and more to the point it becomes much much easier to see what I have traced over, and what I have not.
I increased the brightness of the photo by 25%. I did this visually ( adjusting the brightness slider while looking at the photo ) until the colours where light, but the details was still clear.
My only mistake is that I forgot to put the brightness down before colouring in the tracing. Which is a real annoyance but I have come to like the less-than-photorealistic look of the final peice.
 The
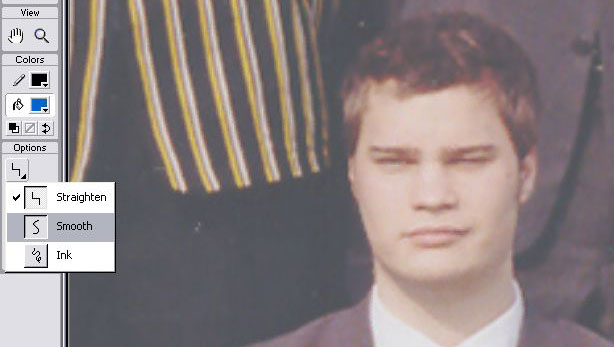
next thing to be done is to choose the correct tool for the job, for this tracing
I want a 50's styled "print", where there are large solid colours
and smooth edges. For this reason I choose the pencil in "smooth"
mode - this means that once I have finished my stroke, Flash will smooth out
any obviously jerky bit ( usually caused by mistakes in holding the tablet and
pen steady).
The
next thing to be done is to choose the correct tool for the job, for this tracing
I want a 50's styled "print", where there are large solid colours
and smooth edges. For this reason I choose the pencil in "smooth"
mode - this means that once I have finished my stroke, Flash will smooth out
any obviously jerky bit ( usually caused by mistakes in holding the tablet and
pen steady).
The other modes possible were:
Straighen: This is where flash trys to detect basic geometric shapes in the pencil line - for instance drawing a rough circul would be correct to a perfect circle, or oval depending on the circumstances. Straight lines are also detected better, this is done on the speed of the stroke ( and hence the complexity of the vector, becuase a faster stroke adds less points to the canvas ).
Ink: This is an unchanged line, except for anti-alaising. A process used to reduce pixelation through intelligent and slight blurring.
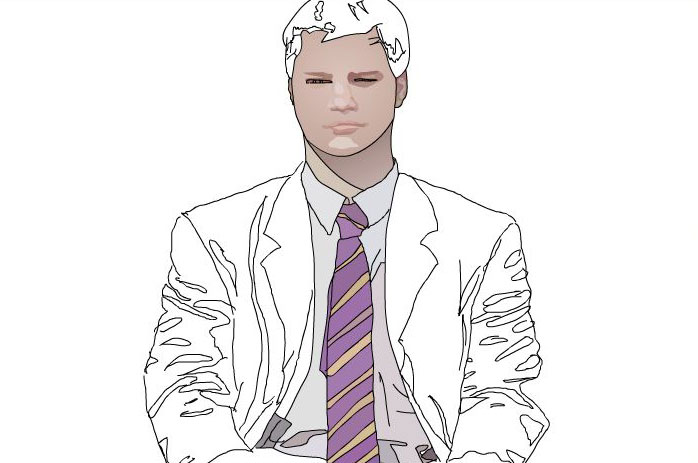
First I do a rought outhline of the blazer, becuase clothing is a much more robust area to trace, that is to say that errors in clothing rarely make the final picture "just look wrong". This is also a good warm up. As you can see I have not just drawn at cloth edges, but have also grouped certain colours by drawing a ring around them ( all along the righ sleeve I have grouped the shadows ). This is becuase I will fill these areas in with a different colour and then remove the lines, leaving a much more stylised look.
The next area to be dealt with is the face, I always find this hard, so I tend to do a very rough outline, and then zoom in to completely redo the zoomed in area. I feel that outlining the whole face roughly gives me more of a feel of what the whole face should look like in the end, and I keep this idea in mind while doing the colour groupings.
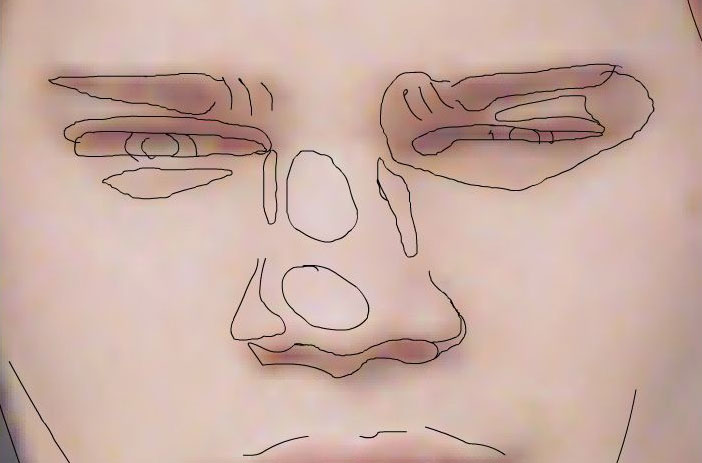
Once zoomed in I will erase all the lines over a certain eye, redo it completely, and the do the other eye, then the nose etc. You can easily see how rought the outlines are here. Also please note the blurring that occurs when zooming in on the photograph - this is one of the limitations of digital art, photos loose quailty but the lines do not, becuase they have been created on the PC and are represented mathematically by vectors in the computer's memory.
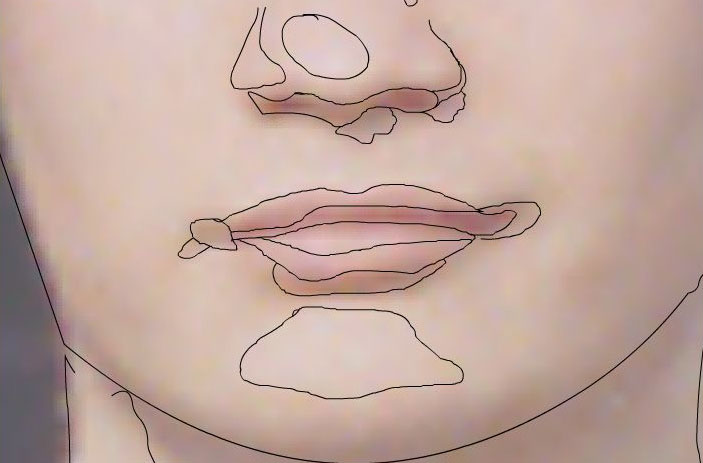
I continue down to the mouth and group all the colours together, instead of trying to draw outlines. This is becuase in my experience outlines mouths always seem to appear feminine, and as this is my mouth I intend to do it properly!
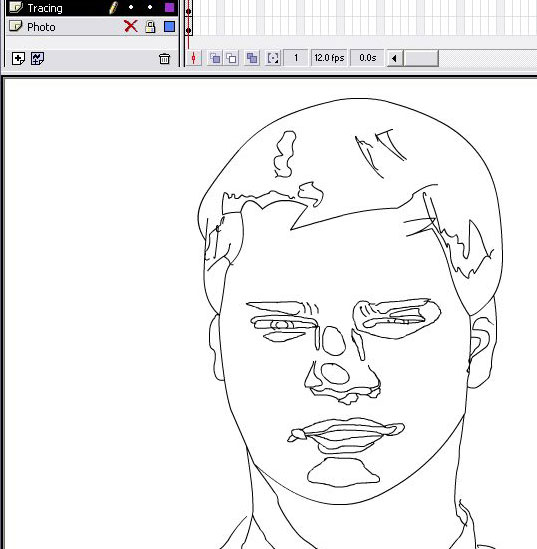
I then hide the photo layer ( see the top left red cross ). You must imagine seeing the photo appear and dissapear without the lines ever moving, becuase this is what allows me to see where I have missed out an obvious line, or perhaps all of the hair!
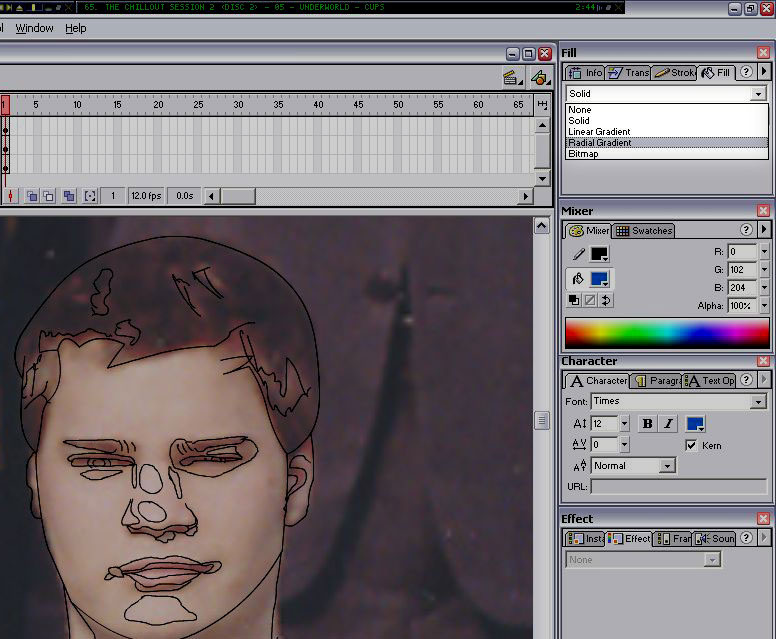
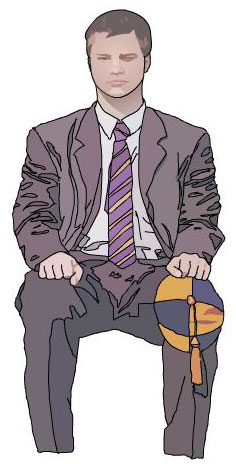
Once satisfied with the outlines, I have to start colouring in my tracing. In the topright of this picture you can see I have selected "Radial Gradient". This allows me to select and inner and outer colour - which are used when filling to make a radial colour gradient. The other options should be self explanatory; except perhaps Bitmap. Bitmap fill is where you use another picture ( photo, texture etc ) as the "colour" to be painted. really it means that if you drew a blob using Bitmap fill, the bitmap (picture) would be cut into the shape of your blob, and put in its place. I have not really found a use for this yet, but I can imagine it being used in texturing walls and so on in backgrounds.
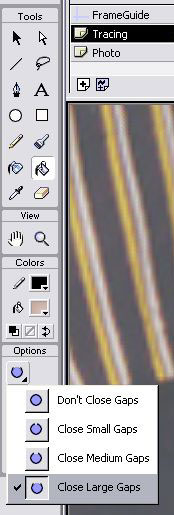
I then select the fill bucket, which is the tool used to pour colour into my rings. However I found that the rings were not closed properly due to my rough style of drawing. So for this reason I select the "Close Large Gaps" mode from the options.
This means that when I try and fill a ring with a small gap (similar to handwritten "o"s) it will assume the gap should be ignored and fill in up to the gap. Creating a hard edge at the line. This is find for me becuase I plan to remove a lot of the lines at the end anyway.
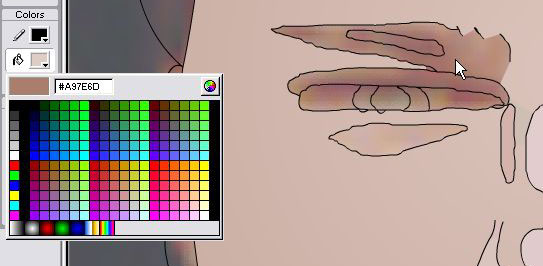
After having done the radial fill for the face I need to select my solid colours for the rest of the face. I find the easiest way to do this is to click on the colour swatch ( which brings up the palette on the right ) but then instead of clicking on a colour in the swatch I click in side my work area on the blurred photo - this give me the colour under the mouse and then I can use this to fill that particular area.
I have gotten a good feel for using colour grouping from all my experimentation with automated grouping in my experiments ( please see Experimental Galley 2 ). It is not always what looks best close up that makes for the most impressive character. Particularly with colour. During my editing in the aforementioned galley I found some hues in the photos which I did not expect. For instance the shadow on my neck in this photo is rather green, and the shadows around the eye in the above picture is rather purple in places. Things which I would not have noticed otherwise.
Now I hide the photo layer again to check for holes and so on in the near-complete area.
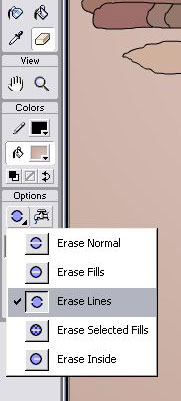
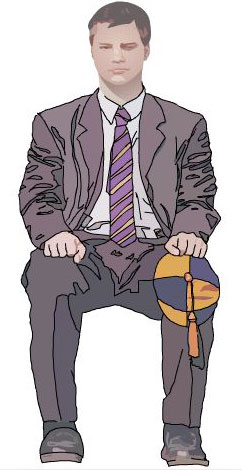
Now to remove the lines that I dont want, this is a relativly easy process, by selecting the eraser and putting it in "Erase Lines" mode only lines will be removed.
The eraser is used in the same way as the paint brush, a white stripe is painted where ever the eraser is used, then once the stroke is complete ( and I have release the button or lifted the pen from the tablet ) the erase figures out what to remove and what to delete. This process leads to some errors and some personal jugdement but that is all part of the skill!
Erase selected means that you can select a solid colour ( by clicking ) and then use the eraser ONLY on that particlar selection.
Erase inside is a fantastic little tool, this allows you to remove fills of any colour that are all within the same "ring" or similar shape that is surrouded by a line ( lines are treated separately from Brush strokes in Flash )
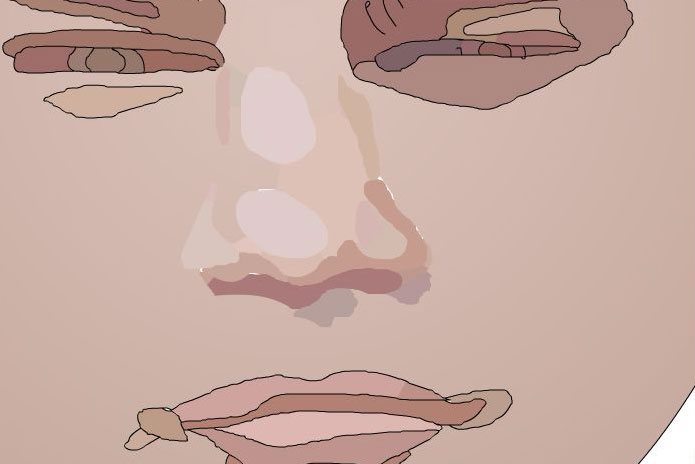
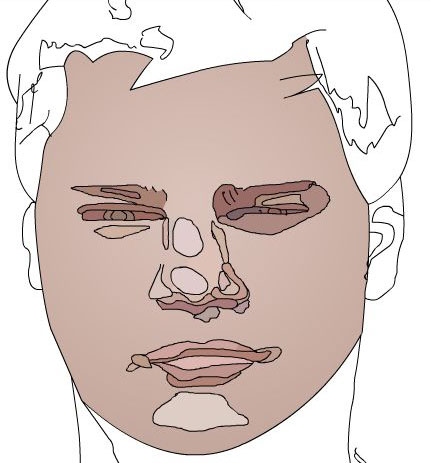
With the lines removes, previously unseen holes around the nose are now visible. These need to be corrected.
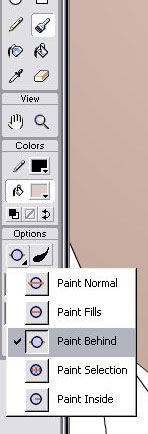
Very similar to the eraser is the Bursh tool. This is a stroke driven fill tool, if that makes sense. The biggest difference is the "Paint Behind" mode. This allows me to paint all over a canvas and then at the end of the stroke it will only paint into holes, that is to say it paints underneath the exsisting paint. It is a slightly odd concept to get a feel for, but once you have used a couple of times it feels very natural.
What I will do with this tool is select a colour near to hole, and then paint all over the hole - without worrying about getting a mess on top of exsisting lines and fills (fills and paint are the same).
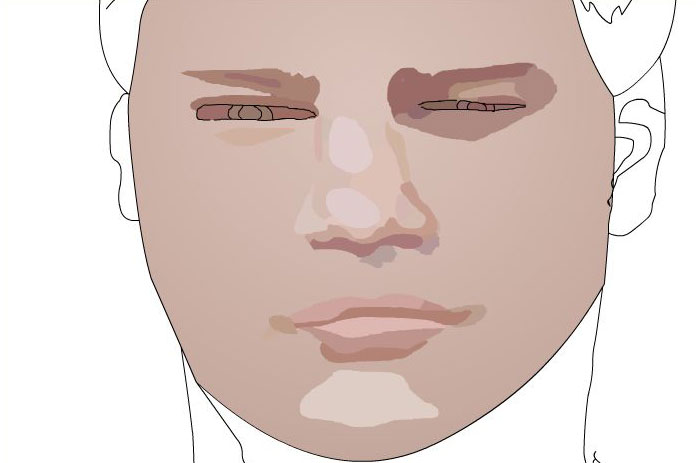
Check the face once again, I am content so it is time to move on to the arguably easier parts. By doing this first I will be able to make sure that the rest of drawing will fit in - it also means that once I finish the rest I will not be sick and tired of the face, and will have enough energy and determination to come back and redo it, if nessesary.
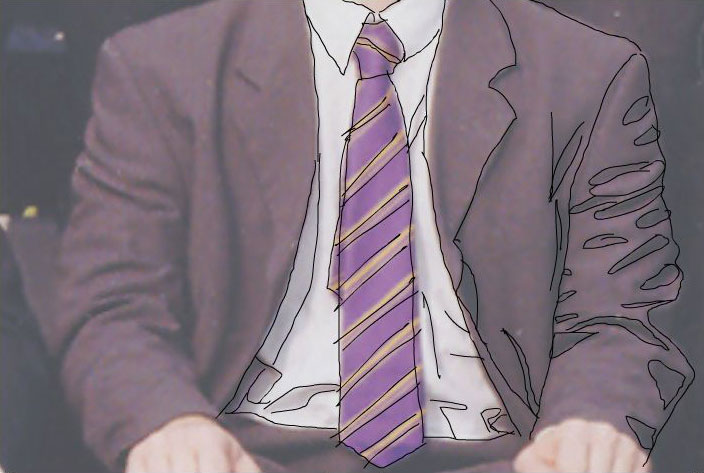
Done the outlines for the rest.
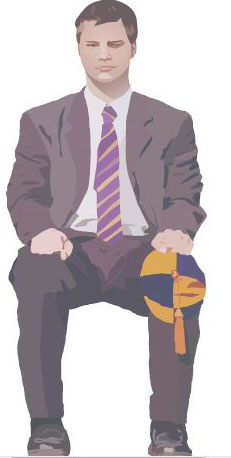
Finally I have finished doing this partiular photo. It took me two days, which is about 5-6 hours of PC time.